
Can't get to nature? Build a backyard bird hide.
- Ron Moller
- Apr 15, 2020
- 4 min read

It's much easier than you think and you can return to it whenever you get the urge to do some bird photography.
No doubt! I get my sanity fix by spending time in nature. Those early mornings, armed with a coffee flask, some snacks and my camera really make me feel alive.
So, what do you do when you cannot get to nature?
To me the obvious answer was to build a bird hide in our back yard.
What really surprised me was how uncomplicated building a bird hide actually was.
You need a perch, a place to feed and a place to hide.
That's it.
It really is that simple.
And you can imagine that these three requirements can be produced in a multitude of ways. Bird feeders can be created from a variety of containers. Finding a branch or two. Easy.
And the hide could be (almost) anything that would hide you in such a way that the birds are not disturbed by your presence. Shade net, blankets, old sheets... even an old tent could work.
The one we (I had some help from my better half, Lizzy) built was the most basic structure we could construct out of what we had available, already.
Here's how we did it...

We started with this pole in our backyard. It was a structure that Lizzy already made for plants to grow up against. The only criteria I had was that it had to be about the same height as I was going to be when I take the pictures. For me this meant that when I had my camera mounted on my trusty old Manfrotto 055, I could look the birds straight in the eye. You might even decide to plan yours around a comfy chair that you know you could spend a few hours in while you enjoy and photograph the birds.
There are many possibilities.
Now we just needed to attach the feeder and the perch to it...

We were lucky to have these wooden disks and I could easily attach it to the pole with just a nail through the center.
I liked it because I want my images to look natural and the wood helps with that. The other thing that really helps you to get natural looking images is a branch that the birds can perch on.
They like viewing the menu from a distance before they commit to eating the spread you put out for them.

We recently trimmed some branches from our Pepper tree and one of these made a perfect perch. It was easily attached with a few wires.
What is important to keep in mind is where in relationship to your feeder you will place the perch. You have to look at the movement of the sun, what lens you plan on using and what your background will look like.
I wanted to make use of the early morning light and placed my branch on the western (more or less) side of the feeder to avoid it obstructing my view of the birds. Be sure to trim away excess leaves and any branches that may obstruct the main ones. You only need a few for the birds to come and sit on and you want those to be clearly visible to the camera. Less is definitely more here.
My lens of choice was a Tamron 150-600mm, and the background was far enough away that I was confident that I would get a good clean background in my images. My biggest challenge was making sure that I do not get the overhead electrical cable in the picture. In the end it all turned out fine.
All that is left to do now is to construct the bird hide itself...

For the front we used the a different part of the same structure that Lizzy had already built.
For the back we just created an upside down V with two poles and secured them with some straw bales. Finally we pulled some leftover shade netting over the structure.

To cover the front wall of the bird hide we used a piece of tarp that I always take with me into the field. To make sure that I can see the birds when I'm in the hide, we covered the top end of the wall with some more shade netting, leaving the bottom end unattached to allow the lens to go through.
We even added another branch in front, but it did not stay there for to long. Crazy Southeaster.
And that's it.
We now have a bird hide in our backyard.
Uncomplicated and it proved to be very effective.
(The only addition I made later, was to hang two scarves (using washing pegs) on the side walls to hide me a little more)
Now for the part that requires a little more patience.
What needs to happen now, is for the birds to get the memo that you opened a (bird) restaurant.
Before I even took my camera into the hide I put food out every day - at least once a day.
This requires patience and takes a few days to create a pattern for the birds to get used to.
But the birds soon catch on.
About five days after the first feeding, I took my camera into the hide...

My first visitor was this beautiful female Cape Sparrow.
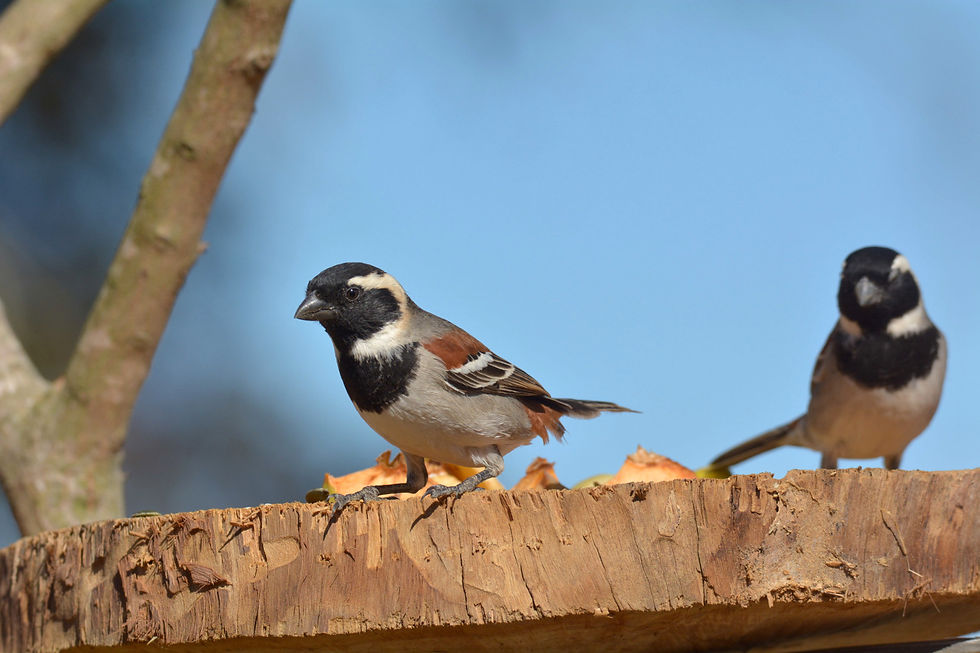
But it wasn't long before the boys arrived to check out the menu too.

See why a perch is important? They are a must-have if you want to capture natural looking images.

Birds like the Southern Fiscal always look from a safe vantage point and the perch is doing its job perfectly.

Once he is satisfied that all is safe - a feast!

It is is not long before they tell friends and family about this new joint that opened up.
(These Cape Weavers are very entertaining and a lot of fun to watch). All you need to do now, is make sure you are consistent with the feeding. It has been almost three weeks since we've built the hide and whenever I find myself out of things to do, I grab my camera and head off to the bird hide.
It never disappoints.
Oh!!
And don't forget that flask of coffee! You might be there for a while.
Comments